Film Loading and
Winding On
When the power adapter is installed in the camera's battery compartment, the camera's
film advance lever cannot be operated manually to advance the film. In this instance
the film must be wound on automatically with the camera's shutter release.
 |
 |
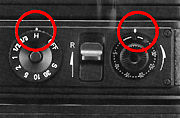
1. Set the motor drive's frame counter to the 'CL' position, and the interval dial to any setting other than 'OFF'. At this time, if the camera's film advance lever is left uncorked, the motor drive will be activated, advancing the film for one frame. |
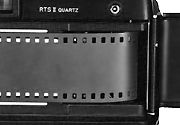
2. Load film in accordance with the camera's instruction manual. Wind on a single frame of film by pressing the camera's shutter release button and then check to see that the film is being wound onto the take-up spool. Pressing of the camera's shutter release button will give you a single-frame exposure; releasing of the finger from the I button will cause the film to be advanced.
3. Close the camera's rear cover, and then wind on the film until the film counter registers "1" by pressing the shutter release button the necessary number of times.
 |
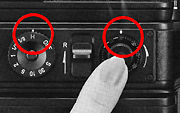 |
If you are using the motor drive's release button for film wind-on and the interval dial is set for high-speed operation ("H", 1/2 or 1/3), press the button intermittently to prevent winding on more film than is necessary. |
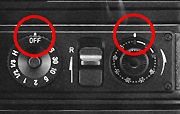
Neither the camera nor the motor drive will function if the interval dial is set
to OFF when the power adapter is being used.
 |
The counter can also be locked for times when you do not wish to use it, or when it is not necessary such as when shooting more than 36 frames in continuous sequence using the 250 Film Back (Optionally available). To lock the counter, set the dial to the "CL" (stands for counter lock) position. |
Shooting
1. Rotate the interval dial to the desired interval setting.
2. Turn the countdown dial of the counter to correspond with the number of frames on the film or with number in the sequence you wish to shoot.
3. Focus, compose the subject and check the exposure. Then depress the shutter release button on either the motor drive or the power pack. When using either release, the film will advance at the preset interval for as long as the release is pressed and held down.
 |
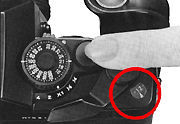
When the finger is removed from the release, the film will be advanced for the next shot. When the interval dial is set at "S" for single-frame shooting, pressing of the release button will trip the shutter and then advance the film for the next shot before turning off the motor drive. The release button on the power pack is handy for taking shots in the vertical position. When using the PMD W-6 with the RTS II Quartz, do not take pictures using the mechanical shutter system. |
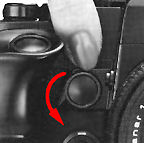
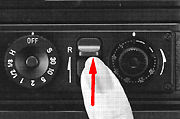
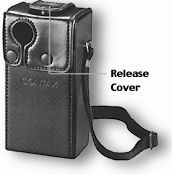
When switching off the AE Lock after shooting with the camera's AE Lock, it can be
easily done if the tiny knob on the lever is accessed and used as shown in the illustration
When the camera's release button is pressed while shooting with the interval dial
in operation, only a single frame exposure will be made regardless of the interval
dial setting.
 |
Other than the camera's release button and another one at the tip pf the hand grip, the power pack was provided with another shutter release button for vertical shooting. |
For long sequences, or when shooting at wide intervals for long periods of time,
the Cable Switch S (available as an optional accessory) can be used for continuous
automatic release at the predetermined interval by connecting it to the release socket
on the motor drive. If the release button is locked in position, it will not be necessary
to continuously hold down the release button.
When using the shutter speed dial's "B" (bulb) setting use the camera's
shutter release button. If the Cable Switch S is used, plug the switch into the camera's
release socket. Shots in the bulb setting cannot be made using the motor drive's
release button or the release socket.
When batteries are badly worn, the motor drive may stop in mid-operation, and a buzzing
sound will be heard. When this happens, immediately turn the interval dial to 'OFF'
and replace the batteries with a fresh set.
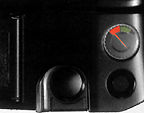
Film Rewind When the frame counter reaches "O"
or when the end of the film has been reached, the LED film-end indicator will glow
and the motor will automatically shut itself off
 |
 |
1. Turn the interval dial to 'OFF'. The LED film-end indicator will extinguish at this time. |
3. Unfold the camera's film rewind crank and wind it to rewind the film. For details on rewinding, refer to the camera's instruction manual.
Always rewind the film when the interval dial is set to 'OFF'. Do not reposition
the interval dial just before or during the rewinding process as the motor will advance
the film and possibly rip the film perforations.
Depending upon the film type, age and temperature, film perforations may tear at
the end if the film winds completely out. As a precaution against this, stop the
film with the counter in exact alignment with the number of frames on the film roll.
Thus, the counter will reach "0" and stop the film while there is still
margin at the end.
Using with Other Contax Accessories
When using the motor drive with the RTF 540, the Auto Bellows PC or the remote
control system, plug in one end of the respective connector cords into the motor
drive's release socket. If plugged into the camera's release socket, you will get
only a single-frame exposure regardless of the interval dial setting.
<Real Time Flash
(RTF) 540> The motor
drive may be used in conjunction with RTF 540 unit for sequential flash photography
up to 5 fps. Insert the release plug of the RTF Release Synchro cord (standard accessory),
the TLA Adapter or the External Sensor Holder (available as optional accessories)
into the motor drive's release socket. Read more info at FLASH
section.
<Auto Bellows PC> Plug each end of the standard accessory
connector cord into the release sockets on the Auto Bellows PC and the motor drive.
When shooting, set the bellow's cable release or the diaphragm stop-down button in
the locked position before pressing the shutter release button on the motor drive.
Read more info at Macro/Close-up photography section.
<Remote Control System> When using with the Infrared
Controller S or the Radio Controller, plug the terminals of the respective connector
cords into the receiver unit jack and the release socket of the motor drive. Plug
the Cable Switch S directly into the motor drive's release socket. For long sequences,
or when shooting at wide intervals for long periods of time, the locking device on
the Cable Switch S comes in very handy. Read more info at remote
photography section.
System Accessories
![]() PMD Control
Cords 100/300
PMD Control
Cords 100/300
![]() PMD Power
Pack Jacket
PMD Power
Pack Jacket
![]() Other System
Accessories
Other System
Accessories
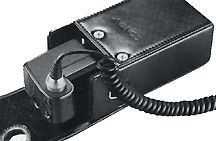
PMD Control Cords 100/300
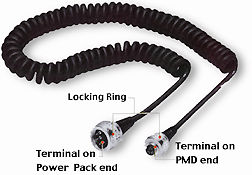 |
These are employed when the PMD Power Pack is used as a remote power source, or when using the AC Control Box. Two types are available, the PMD Control Cord 100 (a 1-meter spiral cord) and the PMD Control Cord 300 (a 3-meter straight coral both types being fitted with a screw on terminal on each end. Remember to set the interval dial to 'OFF' when connecting the control cord. |
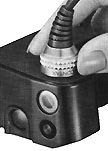
1. Remove the cap from the motor drive's
external power socket and align the guides of the appropriate end of the cord with
the external power socket. Plug in and secure by screwing on the plug's locking ring.
 |
 |
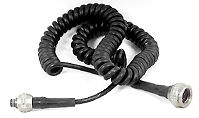 |
Credit: Mr. Milan from Pacific Rim Camera <staff@pacificrimcamera.com> for his contribution of Control Cord shown at left. |
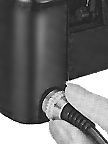
2. Plug the opposite end of the control cord into the power apparatus in use and screw on the locking ring to secure in place.
When disconnecting the PMD Control Cord, unscrew the locking ring and unplug by gripping
the locking ring instead of pulling on the cord itself.
<Inserting the Power Pack>
Insert the PMD Power Pack into the jacket with the PMD Control Cord connected and the release button facing upwards.
 |
The inside pocket of the power pack jacket is useful for storing the battery compartment cover and camera battery which are not needed when the power pack is put into service. |
<250 Bulk Film Back> The 250 Film Back mounts to the camera with the motor drive attached and enables use of 250-frame bulk film.
 |
 |
 |
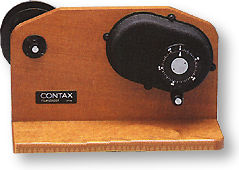
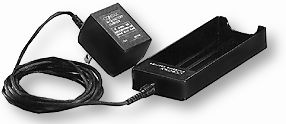
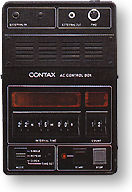
<AC Control Box> The AC Control Box is a digital controlled type of external power source unit for supplying power to the motor drive and camera via the household AC mains electricity.
 |
It enables automatic shutter release at intervals from 1 second to 24 hours, thus greatly extending the scope of interval shooting with the motor drive, even permitting the use of the repeat and clock modes. The control box is equipped with a built-in timer for automatic start and shutoff after the desired number of frames. |
 |
 |
 |
|
|
Type: Grip-type system motor drive.
Mount: Mounts directly to base plate of camera.
Camera: For use with Contax RTS II Quartz, Contax RTS.
Operating Voltage: 15 V DC.
Operating Mode: Interval dial enabling continuous sequence shooting (9 dial settings for fps/interval combinations) plus single-frame operation.
Operating Speeds: High-speed operation ranging from 5 fps ("H"), 3 fps (1/3 setting) and 2 fps (1/2 setting); one frame every 1, 2, 5,10, 30 and 60 ("S") sec. settings; and single-frame operation at "S" setting.
Shutter Speed Coupling Range: Synchronizes at all speeds (except Bulb) including AUTO.
Shutter Release: Built-in electromagnetic release on PMD W-6 and PMD Power Pack units. Fitted with release sockets.
Number of exposures: Up to 36 exposures with regular cassettes; up to 250 using 250 Film Back.
Power Source: PMD Power Pack (utilizing 12 regular or Ni Cd penlight batteries); AC Control Box.
Number of Frames: About 60 rolls of film with manganese batteries; about 120 rolls with manganese-alkaline batteries. (In each case, using 36-exposure film, at "H" setting, under normal temperature conditions.)
Frame Counter: Manually set countdown type (lockable).
Automatic Shut off: Automatically switches off motor dive and LED film-end indicator lights when countdown dial reaches "0".
Film Rewind: Film rewound manually with winding of camera's film rewind crank.
Remote Control: Remote control capability using with Radio Controller, Infrared Controller S, Cable Switch S, AC Control Box, PMD Control Cord.
Sequential Flash: Up to 5 fps of synchronized flash when used in concert with Real Time Flash 540 unit; other speeds and single-frame operation as indicated on interval dial.
Other Features: External power socket; tripod socket.
Standard Accessories: Power Adapter.
Dimensions: 149 (W) x 65.5 (H) 98.5 (D) mm.
Weight: 430 grams.
<Specifications of PMD Power Pack>
Type: External power supply source specially for PMD W-6 unit.
Mount: Mounts directly to base plate of the PMD W-6 unit.
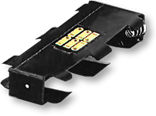
Power Source: Twelve 1.5 V penlight batteries (six to each battery case); provided with built-in battery checker.
Back Cover: Hinged back cover with knob-operated latch.
Other Features: Tripod socket.
Standard Accessories: PMD Battery Cases (two).
Dimensions: 149 (W) x 36 (H) x 72 (D) mm.
Weight: 250 grams (including battery cases but not batteries).
| Previous | 3/3
| Back | to Index Page of Contax
PMD Motor Drive
Instruction
Manuals:
Contax
PMD W-6
| Contax
RTW
W-3
| Back | to Index Page of Contax
RTS
| Back | to Index Page of Contax
RTS II Quartz
| Back | to Index Page of Contax
RTS III
| Back | to Main Index Page of
Contax RTS series models
Camera
Models: | Contax RTS |
RTS
II
| RTS III |
Shared
Resources:|
Motor
Drive-
PMD W6| Winder - RTW-W3 | Screens |
Flash | Macro | Remote | Databack | Accessories | Zeiss T* Optic | Instruction Manuals: Contax RTS HTML | PDF | Contax RTS II Quartz
HTML | PDF | Contax RTS III (3
parts PDF
by mike@butkus.org, M. Butkus, NJ. Part A | Part B | Part C |
OFF TOPIC:- Personal Note
| Message Board | for your favorite Contax RTS Series SLR Models
| Message Board | for your Contax optics
in a shared environment
| Message Board | Specifically for Dispose or Looking for Contax Photographic
Equipment
| Main Reference
Map: RTS - HTML | PDF (206k) RTS II - HTML | PDF(308k) RTS III - HTML | PDF |
Specification: RTS - HTML | PDF(159k) RTS II - HTML | PDF(66k) RTS III - HTML | PDF |
1975: RTS 1979: 139Q 1980: 137MD 1982: 137MA 1982: RTS II |
1985: 159MM 1987: 167MT 1990: RTS III 1992: S2 1992: S2b |
1992: ST 1994: RX 1996: AX 1998: Aria 2000~ |
| List of Carl Zeiss T* lenses for Contax SLR cameras | ||||
About this
photographic
site.
| Home - Photography in Malaysia |
![]()
Credit: Mr. Milan from Pacific Rim Camera <staff@pacificrimcamera.com> for his contribution of the Contax 250 Bulk film back;Mr. "dearaujo" <dearaujo1@mediaone.net> for his images of the Contax RTS and RTW; Mr. Pshea <pshea@nyc.rr.com> for this image of the RTW; Miss Kristina Hauzar-Proctor of www.henrys.com for the images of Contax RTW-W3; MClau, joint maintainer of the Contax RTS MB. Mr. Bodo Bause <bodobause@yahoo.de> for his image appeared in this site. Some of the content are extracts from: Cees De Groot, who maintains a Contax FAQ site and Tim Roger website on Contax SLR cameras, A few of the images on Zeiss lenses were downloaded from Contax US website. My buddy, Yeak & Rizal Yahya, for their cool programming with Contax RTS's Message Board, Note:certain contents and images appeared in this site were either scanned from official marketing leaflets, brochures, sales manuals or publications published by Kyocera over the years and/or contributions from surfers who claimed originality of their own work solely for educational purposes. The creator of the site will not be responsible for any discrepancies that may arise from such possible disputes except rectifying them after verification."Kyocera", "Yashica", "Contax" & "Carl Zeiss T*" are registered trade names of Kyocera Corporation Inc., Japan. A site made with an Apple IMac, dedicated to all fans of Contax cameras and Zeiss Optics.