Summary of Operation (AUTO)
The steps pictured on this page outline use of your XD-7 on automatic shutter-speed
or aperture-priority modes. They give a general idea of how very easy it is to get
perfectly exposed pictures with this camera and are keyed to corresponding sections
of the manual for ready reference. This brief guide may also be useful as a quick
refresher for good results after you have not used the camera for some time. It is
not, however, a substitute for the detailed instructions in the rest of this manual
which should be thoroughly studied for best results.
 |
 |
 |
|
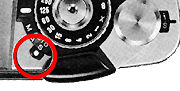
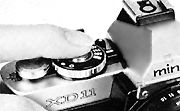
1. Open back cover. |
2. Load film properly; close cover. |
3. Advance the film to "1" |
|
 |
Warning: |
|
|
||
 |
 |
 |
|
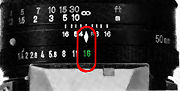
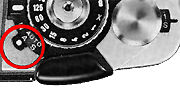
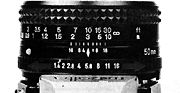
5-1. Set mode selector to "S" |
5-2. Set lens aperture to the GREEN aperture (the minimum aperture) |
5-3. Select a shutter speed of your choice. |
|
|
||
 |
 |
 |
|
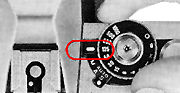
5-1. Set mode selector to "A" |
5-2. Set lens aperture of your choice for depth of field control. |
5-3. Release the shutter |
* XD-7 couples well with Minolta
lenses which are designed to the performance requirements of Minolta camera bodies
in such multimode Although some third party optics can also be used, but for best
compatibility in all the AE modes, Minolta (and Celtic) lenses and system accessories
are highly recommended.
ATTACHING AND REMOVING LENSES
To Attach
1. Remove the body cap from the camera lens mount and the rear cap from the lens
bayonet, each by turning the cap counterclockwise,
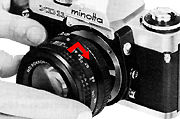 |
2. Align the red mounting index on the lens barrel with the red index above the camera lens mount flange; insert the lens bayonet into the mount; and turn the lens clockwise until it locks into place with a click. |
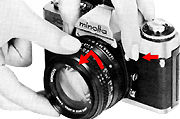
To Remove
While pushing the lens-release button, turn the lens counterclockwise as far
as it will go; then lift the lens bayonet out of the mount.
 |
Caution: If it becomes necessary to set the lens down without a rear lens cap attached, be sure to set the lens only on its front end (except for fisheye lenses), as damage to the diaphragm control pin could result from contact with a hard surface. |
| Previous | Next |
Battery Issues
|
Back | to
Main
Index Page
of Minolta XD-7
| Minolta
XK/XM/X1
| Minolta
X-700
| Minolta
Maxxum 7000
|
| Message
Board
| for your favourite
Minolta
XD-7/XD-11
SLR camera(s)
| Message
Board
| for your Minolta
Optics in a shared environment
| Message Board | Specifically
tor Dispose or Looking for Minolta Photographic equipment
Home - Photography in Malaysia |
Copyright © 2000 leofoo® MIR Web Development Team
Credit: Satosh Oka for some of the very high quality images for the Minolta CD-7 and XK Motor used in this site. Oleg Volk, who has offered some help during the initial stage of development of this site; Stephen Schwartz on the few new images of XK; Mark Wasmer for the original Brouche of the few Minolta cameras; Dick Sullivan whom I used some of his info as reference in this site; Mr Poon who has helped me eith some of the images used in this site. Minolta, XD-7, XK, XM, X1, Rokkor, MC lenses are either registered tradenames or trade mark of Milnolta Optical Co. Ltd, Japan. Asite dedicted to all Minolta fans worldwide.