When and how much to adjust
exposures ?
One way or another since virtually all cameras have an exposure meter built in to
help a user with a guildance of a rough exposure indicator. But since all metering
cells read light as black and white (except the current Nikon F5 autofocus camera
- which has a colour matrix circuit that separate scene reads in RGB) and the standard
reading was a 18% grey - which closely ressembles most general pictorial situations
(green being the closest). Well, not all photographic situations are such ideal to
the 18% grey, thus - anything lighter or darker than 18% grey demands an exposure
comepensation to coincide with the 18% so as to provide an theoretical good exposure.
When and how much such compensation is required depends on user's preference and
respective knowledge to deal with un-desirable lighting conditions. Here are some
guidelines when you use that with the Minolta XD-7's built in features:
1. In situations where there is a great contrast difference between the subject and
background and the most important area is considerably darker than the area surrounding
it, set the index of the exposureadjustment control at from +1/2 to +2. Examples
of such pictures are ones with strong backlighting and no fill-in illumination or
subjects against a background of snow or light colored sand around the sunny beach,
unless the bright area occupies a very small part of the image frame.
2. If the most important subject area is much brighter than the rest of the picture,
set the index of the exposure-adjustment control at from -1 to -2. Examples of this
kind of picture are subjects in a spotlight or shaft of sunlight, or against a very
dark background, unless the background occupies only a small area in the image frame.
A. As above, when copying documents printed on white stock or other subjects that
are predominantly light in color, an adjustment to +1/2 or more may be called for.
Similarly, you will probably want to make an adjustment from -1 to -2 for predominantly
dark copy matter or that on a dark background.
B.You may also want to use the adjustment control when making multiple exposures.
Exactly how it should be set will depend upon the number of expousres and the effect
desired. A simple example would be for a "spirit" or "ghost"
picture in which background details seem to show through semi transparent subject:
The above suggestions will serve as starting points for trial; individual conditions
an, taste will of course determine exact fine exposure.
Focusing
Most great pictures have acceptable and resonably sharp focusing. Most of the time,
unless it is intentional to create a blur effect, users are the one that form the
main cause in creating unsharp pictures. Features found in camera such as the focusing
screen of your XD-11 features a split-image spot surrounded by a band of microprisms
in the center of an acute matte field which are only focusing aid.
To focus the camera visually with usual lenses, look through the viewfinder with
lens at full aperture and turn the focusing collar on the lens until the upper and
lower subject images in the spot are exactly aligned with no broken lines between
them and/or the subject image in the band does not shimmer or appear broken up. At
this point, the subject image within the focusing aid should appear clearest and
seem to blend with that on the matte field around it.
Though the most satisfactory focusing aid and method depend upon the conditions and
personal preference of the photographer, the above method may provide best results
with medium wideangle to short telephoto lenses.
Generally speaking, however, you will probably find that using the split-image spot
will provide the easiest way to focus for subjects having vertical lines; the microprism
band for medium wide-angle and telephoto lenses and subjects not having vertical
lines; and the matte field for longer lenses or macro or other work involving considerable
lens extension.
Holding the camera
Holding the camera securely when exposures are made is as important as focusing.
Even slight movement at the instant of exposure can result in "blurred"
photographs, especially when operating with slow shutter speeds.
To hold the camera horizontally, cradle the bottom of it in the palm of the left
hand with the thumb and index or middle finger on the focusing grip of the lens.
These fingers can also be used to turn the aperture ring. Grasp the camera body firmly
with the right hand so that the index finger rests on the operating button. In this
position, the thumb can conveniently operate the film-advance lever.
The camera may be held in a vertical position using the thumb of the right hand to
push the operating button while the left hand is used for support and focusing. Another
possibility is to rotate the camera from the horizontal position and hold it so that
the rewind-crank end is cradled in the left hand.
Depth of field
The distance behind and in front of the focused distance within which the image appears
acceptably sharp is called the depth of field. There are a couple of factors that
may allow a photographer to 'toy' around with the degree of depth of field which forms one of the core component that
makes photography so interesting and exciting (The other factor is shutter speeds
- which will yield another effect in an eventual image).
It extends a greater distance behind the focused distance than in front and is determined
by three factors: the aperture size, the distance at which the lens is focused, and
the focal length of the lens in use. Depth of field increases as the lens is stopped
down (e.g., f/2 to f/16) and becomes greater the farther from the camera the lens
is focused. It decreases as the lens is opened up (e.g. f/16 to f/2) and the closer
to the camera the lens is focused. Depth of field is greater for short focal length
lenses than for telephoto's at the same focused distance and aperture. It is at its
least for any given lens in nommal mounting when the lens is at maximum aperture
(as when metering and focusing nominally with Minolta MD- or MC-type lenses) and
at minimum focusing distance.
Releasing the Shutter
 |
The way the camera is supported when
exposures are made and how the shutter is released are as important as focusing for
best photographic results, and to avoid blurred pictures due to camera movement during
exposure these factors become more critical the slower shutter speed. With the possible exception of highest speeds, the camera or hands holding it should generally be steadied against your face or body when you release the shutter. At slower speeds, it is advisable to steady the camera against a doorframe, post, or other firm support while depressing the release. The shutter should always be released with a slow, steady squeeze - never a quick jab - preferably while holding your breath. |
For maximum sharpness when making exposures too long to permit hand-holding the camera, mount it on a tripod using the built-in socket on the bottom and trip the shutter with a cable release screwed into the threade socket provided in the operating button.
NOTE: If the eyepiece is not being shielded by the photographer when the shutter is released in this way, the eyepiece shutter should be closed.
Care, Storage and maintainance
As with all high-precision instruments, no part of your XD-7 should ever be forced at any time. If operation is not as you think it should be, consult an Minolta service crew (Frankly, I doubt they still support the XD-7 or earlier manual focus bodies - of which all manufacturers are avoiding, not just Minolta) or any reputable and experience service centers. But most of all, user care is to avoid such inconvenience.
Always keep your camera in its case with the lens capped when not in use.
Never subject your camera to shock, high heat and/or humidity, water, or harmful chemicals or gases.
Never attempt to lubricate any part of the body or lens on your own.
Always use a body cap when a lens is not installed on the body, keep lenses, properly capped front and rear, in their cases when not in use.
Never touch the shutter blades or anything inside the front of the body with the fingers. These parts and the inside of the back should be dusted with a soft brush from time to time as necessary, with particular care never to exert pressure on the shutter blades. The anti-corrosion treatment of these blades may cause them to appear brownish or soiled, but this is normal and may be disregarded.
Never touch lens or other glass surfaces with the fingers. If necessary, remove loose matter from them with a blower lens brush. Use special photographic lens tissue or a soft clean cloth to remove smudges or fingerprints with a gentle circular motion. Only if absolutely necessary, the tissue may be moistened very slightly with not more than one drop of a satisfactory quick-evaporating fluid cleaner specially compounded for photograph ic lenses. Such fluids must never be dropped directly on the g/ass surface
Smudges or fingerprints on the mirror may be removed with lens tissue slightly moistened with lens-cleaning fluid as above.
External camera and lens-barrel - but not g/ass - surfaces may be wiped with a soft, silicone-treated cloth.
Never leave the shutter or self-timer cocked when the camera is to be stored overnight or longer. It is advisable to operate the film advance and release the shutter once or twice from time to time during extended storage.
If the camera is to be stored for longer than two weeks, the batteries should be removed.
If the camera is to be stored for a long period of time, body and lens should be returned to their original packing and kept in a cool, dry place away from dust or chemicals, preferably in an airtight container with a drying agent such as silica gel.
 |
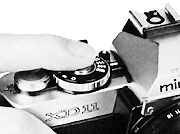
Credit: Image of this simpler Minolta XD-5 courtesy of Mr. Eric Noirtin ® <enoirtin@msn.com> Image copyright © 2003. All rights reserved. Please respect the visual property of the contributing photographer. |
| Back | to Main Index Page of Minolta XD-7
| Minolta XK/XM/X1 | Minolta X-700 | Minolta Maxxum 7000 |
| Message Board | for
your favourite Minolta XD-7/XD-11 SLR camera(s)
| Message Board | for your Minolta Optics in a shared
environment
| Message Board | Specifically tor Dispose or Looking for Minolta Photographic equipment
About this photographic site.
Home - Photography in Malaysia |
Copyright © 2000 leofoo® MIR Web Development Team
Credit: Satosh Oka for some of the very high quality images for the Minolta CD-7 and XK Motor used in this site. Oleg Volk, who has offered some help during the initial stage of development of this site; Stephen Schwartz on the few new images of XK; Mark Wasmer for the original Brouche of the few Minolta cameras; Dick Sullivan whom I used some of his info as reference in this site; Mr Poon who has helped me eith some of the images used in this site. Minolta, XD-7, XK, XM, X1, Rokkor, MC lenses are either registered tradenames or trade mark of Milnolta Optical Co. Ltd, Japan. Asite dedicted to all Minolta fans worldwide.