For shooting subjects which are located closer than the closest possible focusing distance of the lens, Nikon makes a wide variety of equipment: (Go to Close-up Photography section)
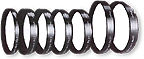 |
1) close-up Attachment Lenses |
No. 0, 1, 2, 3T, 5T and 6T. These lenses screw into the front of the lens just like filters to magnify the image. Exposure metering can still be done at full aperture without compensation.
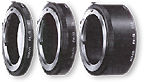 |
2) Auto Extension Rings PK-11, PK12, PK-13. |
These fit between the lens and camera body. Used singly or in combination, exposure determination is done at full aperture with all AI-type Nikkor lenses. (the PK-11 cannot be attached to the AF-Nikkor lenses).
 |
|
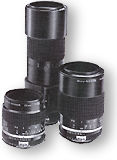
4) Micro-Nikkor 55mm f/2.8, 105mm f/4 and 200mm f/4 IF. These specially designed lenses offer continuous focusing from infinity to down to 1/2x life size. To obtain 1/2x to 1x magnification with an AI Micro-Nikkor lens, the use of an auto extension ring is required: the PK-13 for the 55mm f/2.8, and the PN-11 for the 105mm f/4; to obtain magnifications from infinity up to 1x with the 200mm f/4 IF, use the Nikon Teleconverter TC-300. Even with these accessories, exposure is determined at full aperture. Note that in close-up photography, depth of field is generally shallow. Thus you should stop down as much as possible when photographing a subject with great depth.
 |
|
 |
|
|
|
For lenses not appearing in this list, focus-aid operation is impossible with any close-up equipment attached. In addition, focus-aid operation cannot be performed when a lens is mounted in the reverse position.
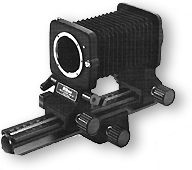
Notes: 1) The F3AF's meter coupling lever (14) should be pushed up before attaching a bellows unit or non-AI extension rings, such as the PK-1, 2, 3, PN-1, etc. 2) Before attaching the PB-6 to the F3AF, the DX-1 Finder should be first removed from the camera body. 3) Auto Extension Rings PK-1 and PK-11, Extension Ring K1 and Auto Adaptor Ring BR-4 cannot be attached to AF-Nikkor lenses.
Duplication work and photomicrography
The F3AF combined with the proper accessory enables you to perform duplication work or photomicrography. In these specialized areas of photography, however, focusing should be performed manually using the matte portion of the focusing screen as autofocus/ focus-aid operation is, is most cases, impossible. In addition, exposure compensation is required because these areas of photography represent unusual contrast situations. Shown in the table is the relationship between specific photo types and proper exposure. Since this is meant to be a guide in practise, you should make further compensation by experimentation until you achieve the proper results.
- Since colour slide
film has small exposure latitude, it is advisable to take an extra shot, keeping
the following in mind for automatic measurement:
- One-stop overexposure for a light-toned subject
- One-stop underexposure for a dark-toned subject
- When using microfilm for duplication work, it is better to determine the exposure after taking experimental shots, since microfilm has a very small latitude, too, and the results are easily affected by the developing conditions and by the film emulsion number.
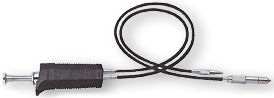
- To avoid vibration, you can make the exposure by turning the illumination on and off.
- It is advisable to use a cable release to eliminate camera vibration.
Some handy and useful Accessories
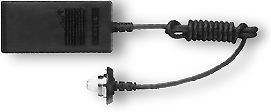 |
Anti-Cold Battery Pack DB-2 |
In cold weather, use the Anti-Cold Battery Pack DB-2, which accepts two AA-type batteries, as an alternative power supply to the batteries inside the camera body. Simply connect the DB-2 to the camera body, then slip the assembly inside your pocket or coat to keep it warm. This assures that the camera's metering system will function even in very cold temperatures.
 |
|
|
 |
|
|
Nine models are available, offering a choice of the following dioptres: -5, -4, -3, -2, 0, +0.5, +1, +2 and +3; the dioptres represent the combined dioptre of the viewfinder and the lens, and not the dioptre of the eyepiece correction lens only.
Constructed of Nikon's own optical glass, Nikon filters not only protect the front of the lens, but provide colour correction or allow you to create special effects. As shown in the table, Nikon filters are broadly divided into the screw-in type and the drop-in type.
|
Notes:
|
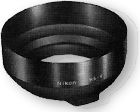 |
Note, however, that some lens hoods can be used in common by several lenses. |
 |
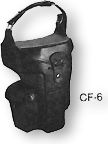 |
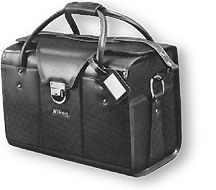
Camera Cases |
Two camera cases are available for the Nikon F3AF: The CF-24 Semi-Soft Leather Camera Case houses the camera body with the AF-Nikkor 80mm f2.8 attached; the CF-6 Leatherette Speed Camera Case accepts the camera plus the AF-Nikkor 200mm f3.5 IF-ED.
 |
 |
|
 |
|
|
| | | Back to Index of Nikon F3 Models Back to Pictorial History of Nikon SLRs |
|
|||||
|
|||||||
| Back to Main Index Page of Nikon F3 Site |
| About this photographic site | Contributions and Credits |
 |
Home - Photography in Malaysia |