 |
Basic Flash Operations |
 |
 |
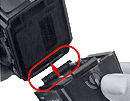
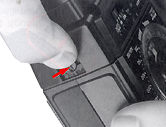
2) Attach the flash unit coupler to the flash unit. |
Note: If batteries have already been installed inside the battery chamber, make sure the ON/OFF switch is at the "OFF" position to avoid accidental firing.
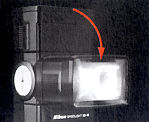
Position the flash unit and flash unit coupler, so that the secondary flash head on the flash unit and the sensor on the flash unit coupler face the same direction. Insert the positioning claw into the slot on the flash unit. Then, while applying pressure to the open/closed knob, push the flash unit coupler into the flash unit until it clicks into place.
 |
|
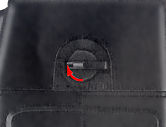
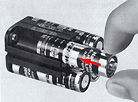
4). Remove the
Battery Holder MS-5
Open the battery chamber lid by sliding it in the direction of the arrow and remove
the battery holder.
 |
 |
|
 |
|
Notes: 1) Use of manganese batteries is not recommended because their power is insufficient for operate the SB-16 at full capacity 2) Do not mix brands or types of batteries. Also, avoid mixing new and old batteries since proper performance will not be obtained.
 |
|
 |
|
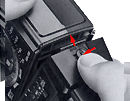
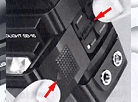
8). Attach the
flash unit to the camera's accessory shoe. Notes:
1)
If you are using an F3-series camera, make sure that the ASA/ISO film speed is already
set on the camera before attaching the flash unit, as the camera's ASA/ISO dial cannot
be changed after the flash is attached to the accessory shoe. 2) For the Nikonos-
V camera, an optional V- Type Sync Cord is required. For details about flash unit
attachment to the Nikonos-V, refer to the Sync Cord's instruction manual.
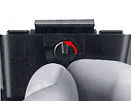
With the SB-16A, turn the locking ring
around the mounting foot counterclockwise until the AS-8's foot is uncovered (fig.
1). Then slide the mounting foot onto the camera's accessory shoe as far as it will
go (fig. 2). Finally, tighten the locking ring to prevent the unit from accidentally
slipping off (fig. 3).
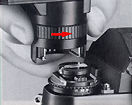 fig. 1 fig. 1 |
|
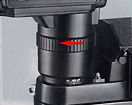 fig. 3
 |
 fig. 2
 With the SB 16B, turn the locking nut on the mounting foot counterclockwise until it reaches its upper limit (fig. 1). Then slide the mounting foot forward into the shoe as far as it will go (fig 2). Finally, tighten the locking nut to prevent the unit from accidentally slipping off (fig. 3).
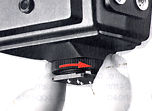 fig. 1 fig. 1 |
|
 fig.3 fig.3 |
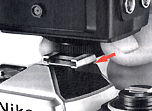 fig. 2
 |
9). Tilt the flash head to the normal shooting position. |
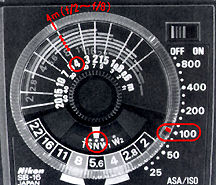
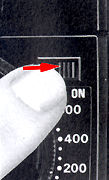
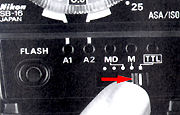
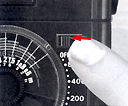
10). Set ASA/ISO film speed. Turn the ASA/ISO film speed setting ring around the exposure calculator dial, until the ASA/ISO index is opposite the speed of the film loaded in your camera.
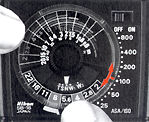 |
Also confirm that the film speed is properly set on the camera. |
 |
|
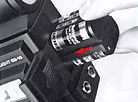
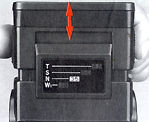
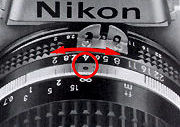
Note: When the subject is closer than 1 meter, it is recommended that you use a zoom setting which is one step less than the lens focal length (e.g. use the 35mm setting with a 50mm lens).
For lenses longer than 85mm, use the 85mm setting. For a 24mm lens, attach the Wide-Flash Adaptor ~ with the zoom head set at W1. To prevent light falloff at the edges of the picture, do not use lenses wider than 24mm. In the example, the zoom head is set at 35 opposite the letter N.
 |
|
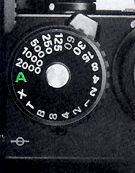 |
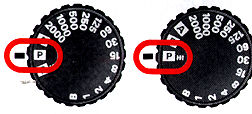
 For example, set the shutter
speed dial of F3-series cameras or the FE2 to A or set the shutter speed/mode selector
of the FG to P or A. For example, set the shutter
speed dial of F3-series cameras or the FE2 to A or set the shutter speed/mode selector
of the FG to P or A. |
 |
|
 |
|
 |
|
 |
|
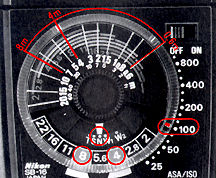
For non-TTL automatic operation, the exposure calculator dial provides a choice of two f/stops. The blue and orange lines at the bottom of the dial show the usable f/stops. For example, with ASA/ISO 100 film, you can choose f/8 or f/4. The auto shooting ranges with the zoom setting at N (for a 35mm lens), are 0.6 to 4 meters (2.0 to 31 ft.) and 0.6 to 8 meters (2.0 to 26 ft.), respectively.
 |
 |
|
C-14) Set the exposure mode selector of the F-501/N2020 to P DUAL, P or PHI, or set the shooting mode selector of the F 301/N2000 to P or PHI.
 |
 |
|
C-15). Set lens to the minimum aperture (largest f-number).
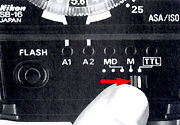
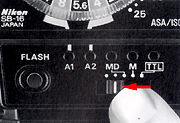
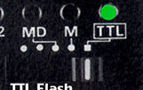
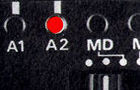
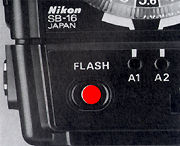
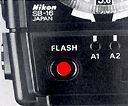
17). Turn on the flash unit. Slide the SB-16's ON/OFF switch to the right. Immediately, an LED will light up (green LED for TTL operation, or red A1 or A2 LED for automatic operation).
C-16) Set the SB 16's mode selector to TTL. |
 |
For automatic operation (A2) |
|
|
|
 |
||
Note: The LED may blink for a short while after the flash unit is turned on. This does not indicate a malfunction.
* Although Nikon specified strictly use of AI-S Nikkor for such operations, independent users confirmed AI-Nikkor can also be used. However, since there is no official clearance from Nikon, please experiment yourself.
 |
|
 |
|
 |
|
|
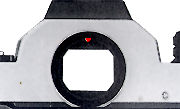
Note: If the flash unit fired at its maximum output, the ready-light blinks as a warning immediately following the shot to indicate there still may be underexposure. In this case, check the combination of shooting distance and aperture selected, and use a wider aperture or move closer to the subject if necessary This warning is also provided in the viewfinder of all Nikon cameras having a built-in ready-light (except F2-series cameras).
 |
|
|
Part
I | Part
II | Part III | Part IV | Part V | Part V Back to Index of Nikon Flash Back to Index of Nikon SB-16 Back to Index of Nikon F3 Models |
|
|||||
|
|||||||
