Modern
Classic SLRs Series : |
1. Remove the battery clip from the camera body. Use a coin to twist the clip counterclockwise to unscrew it.The Nikon F3AF is essentially an electronic SLR camera and will require battery to power all its major camera operations (There is a mechanical backup lever supplied should battery fail to function in extreme temperature or be depleted). Thus, you have to install a battery(ies) into the camera before using the camera.
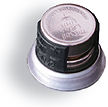
2. Load batteries into the clip.Wipe the battery terminals clean and insert the two 1.55V silver-oxide batteries (like common button cells LR-44 ) supplied with the camera (when it is new in box - but unlikely), making sure that the + signs are up. Two 1.5V alkaline-manganese batteries or one 3V lithium battery can also be used.
Caution: As a precautionary measure, Keep batteries away from infants and small children. In case a battery is accidentally swallowed, call a doctor immediately as the material inside the batteries can cause serious problems.
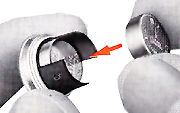
3. Reattach the battery clip.
Slip the battery clip back into the camera body and screw it tightly into place.
4. Remove the battery chamber lid (9) from the finder.
Apply pressure to the battery chamber lid located at the side of the viewfinder to slide it off.
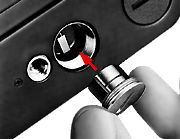
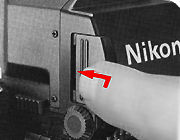
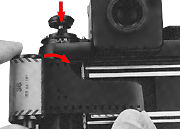
5. Load the batteries into the finder's battery chamber.
Load two AAA-type batteries into the batteries chamber, making sure the positive and negative (+ and -) terminals match the diagrams inside the holder.
Caution: Ni-Cd batteries should not be used as they might cause an explosion. Someone has mailed me a pix of the Anti-Cold battery DB-4 specially designed for the DX-1 finder which I am not aware of, click here to view.
6. Reattached the lid.
White applying pressure to the batteries with the lid, slide it on slide it on until it clicks into place.
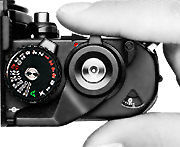
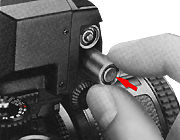
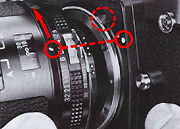
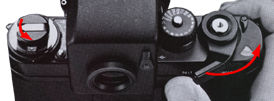
7. Move the power switch to uncover the red dot.
Turn the switch clockwise until it clicks into place. This makes the camera ready for exposure metering and autofocus shooting.
8. Depress the shutter release button halfway.
This activates the exposure meter and autofocus functions. Both stay on for 16 seconds after you take your finger off the button, the turn themselves off automatically to conserve battery power.9. Check battery power.
Look through the viewfinder. Without a lens mounted on the camera body, the focus-impossible warning (red X-shaped LED) blinks or lights up continuously, while the liquid crystal display (LCD) shows the shutter speed. These displays indicate that the batteries have been properly installed and their power is adequate.
![]()
If neither the red X nor the LCD appears, check battery installation in the camera body or replace the batteries in the body and check again. If the red X does not appear but the LCD does, check battery installation in the finder or replace the finder's batteries with a fresh set.Note : If a lens is mounted on the camera, either the red X or one or both the focus indicators (two red LED arrows) will light up.
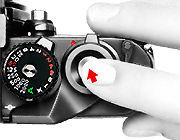
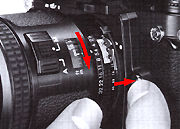
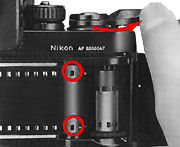
10. Mount the lens onto the camera.
First, make sure that the meter coupling lever is locked in the "down" position. Grasp the lens by its lens barrel. Then, line up the aperture index on the lens with the lens mounting index on the camera body and twist the lens counterclockwise until it clicks into place. Confirm that the aperture index is right on top.
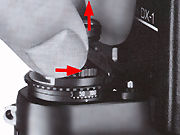
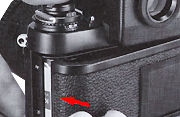
To remove : Push the lens release button and turn the lens clockwise until the lens comes off.
Notes : 1) Lenses usable with the Nikon F3AF, plus DX-1 Finder, are listed on other sections in this site. 2) Never touch the AF contacts inside the camera's lens mounting flange or those on the lens bayonet mount. 3) When changing lenses with film loaded in the camera, be careful not to expose the mirror box to direct sunlight.11. Open the camera back.
While pushing the camera back lock level counterclockwise with your thumb, lift the film rewind knob and the camera back will pop open.
Note : If you have used a motor drive, be sure that the motor drive coupling cover is returned to the camera's base plate; otherwise, the film might be inadvertently exposed while shooting.12. Install the film cartridge.
Drop the film cartridge into the film cartridge chamber so that the film leader points toward the take-up spool , and push the rewind knob back down into place.
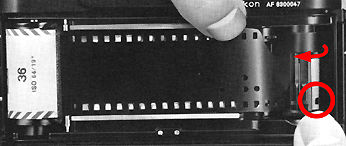
Notes:
1) Any 35mm film cartridge can be used.
2) Handle film in the shade to avoid direct exposure to sunlight.13. Insert the film leader in the take-up spool.
Pull the leader across the camera and insert it into one of the slots in the film take-up spool.
Advance the take-up spool slightly with your finger to engage the film's perforations with the teeth of the take-up spool and sprocket .
14. Wind the film advance lever to advance film onto the take-up spool.
Wind the film advance lever and depress the shutter release button until the film sprockets engage the perforations on the edges of the film.
15. Close the camera back.
Make sure that the perforations are perfectly meshed with the sprockets and that the film is set between the film guide rails. Then, close the camera back until it snaps shut.
16. Take up the film slack.
Fold out the film rewind crank and rotate it in the direction of the arrow until it stops. Then fold the crank back in.17. Make blank exposures until the frame counter reaches frame one.
To dispose of the first few frames exposed during film loading, continue to alternately advance the film and depress the shutter release button until the counter reaches frame one (the first dot past 0).
While making blank exposures, check that the rewind knob is rotating, indicating the film has been loaded correctly and is being advanced. If the knob does not rotate, reload the filmNotes : 1) When making blank exposures, set the shutter speed dial to A or to 1/125 sec. or above, and the shutter will be released at 1/80 sec. with 80 or M 80 displayed by the LCD in the viewfinder.
2) Do not take pictures prior to the first frame, as the meter does not function until the counter reaches one.| Previous | NEXT | Basic Setup Operations 2/12
NavBar | | |
Back to Index of Nikon F3 Models
Back to Pictorial History of Nikon SLRs
About this photographic site Contributions and Credits
Home - Photography in Malaysia
| Back to Main Index Page of Nikon F3 Site |
About this photographic site Contributions and Credits
Home - Photography in Malaysia
Modern
Classic SLRs Series : |