17. Make blank exposures
until the frame counter reaches frame one.
To dispose of the first few frames exposed during film loading, continue to alternately
advance the film and depress the shutter release button until the counter reaches
frame one (the first dot past 0).
 |
|
Notes
: 1) When making blank exposures, set the shutter speed dial to A or to 1/125
sec. or above, and the shutter will be released at 1/80 sec. with 80 or M 80 displayed
by the LCD in the viewfinder.
2) Do not take pictures prior to the first frame, as the meter does not function
until the counter reaches one.
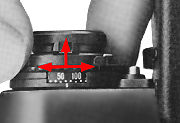
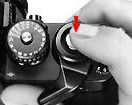
18. Set the ASA/ISO film speed.
Lift up the ASA/ISO film speed dial and rotate it in either direction until the white dot is opposite the ASA/ISO film speed in use. Also make sure that the exposure compensation index is set to the red 0. This programs the camera's exposure meter so that it may provide a proper exposure for the type of film being used.
 |
|
 |
|
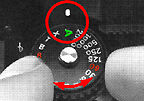
The built-in locking mechanism ensures that the dial cannot be accidentally shifted from the A (Auto) position during shooting. To set the dial to other positions, turn the dial while depressing the shutter-speed dial lock button .
 |
|
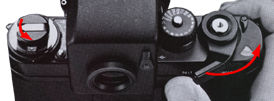
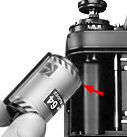
21. Set the f-number
on the lens.
Turn the aperture ring on the lens until the desired f - number is opposite the
aperture index. The selected f-number appears in the viewfinder for convenient reference.
Use the following suggestions as a guide in setting the f/stop on the lens (when
the 80 mm f/2.8 is used):
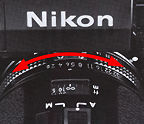 |
Indoors : f/2.8 ~ f/4 |
Note : Depending on your preference, the depth of field as well as the shutter speed can be controlled by your selection of the shooting aperture.
 |
 |
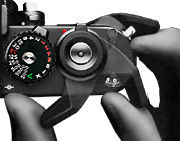
22. Hold the camera steady. |
Use the index finger of your right hand to depress the shutter release button and your thumb to wind the film advance lever. Wrap the other fingers of your right hand around the camera body. You can adapt this basic posture to both horizontal and vertical format shooting. To hold the camera steady, it is advise to lean on or against something strong and stable (e.g., a wall).
 |
|
 |
 |
|
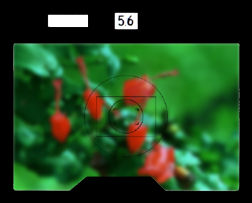
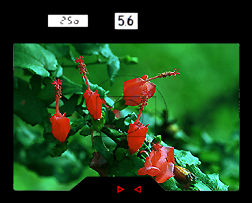
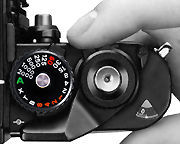
While looking through the viewfinder, depress the shutter release button halfway to turn on the expose meter and autofocus functions. The LCD indicates the automatically selected shutter speed to match the aperture set on lens. As long as neither +2000 nor -8- appears in the shutter speed display, the camera gives the correct exposure. If either indication appears, adjust the aperture ring on the lens until a desirable shutter speed is indicated. The f-number you have set on the lens is also shown in the aperture-direct-readout (ADR) window. When both red arrows light up, they indicate that the image is in focus.
 |
|
 |
|
 |
|
 |
|
 |
|
 |
|
|
| | | Back to Index of Nikon F3 Models Back to Pictorial History of Nikon SLRs |
|
|||||
|
|||||||
| Back to Main Index Page of Nikon F3 Site |
| About this photographic site | Contributions and Credits |
 |
Home - Photography in Malaysia |